
Securing your website with SSL (Secure Sockets Layer) is essential for protecting sensitive data and building trust with your visitors. If you’re using cPanel, the “SSL/TLS Status” feature makes generating and managing SSL certificates easy. Here’s a step-by-step guide to help you through the process:
- Step 1: Log in to cPanel
Access your cPanel account using your credentials, or from your The HostMe account. Once logged in, you’ll see the cPanel dashboard with various tools and features.
- Step 2: Locate “SSL/TLS Status”
In the cPanel dashboard, navigate to the “Security” section. Here, you’ll find the “SSL/TLS Status” option. Click on it to proceed.

- Step 3: Run AutoSSL
To generate SSL certificates for your domains, click on the “Run AutoSSL” button. This feature automatically issues free SSL certificates for eligible domains. The process may take a few minutes. So just wait for few minutes.

Now in front of your domain, the green circle would be showing, which means the SSL has been generated. Now we need to force all the incoming traffic to the SSL version of the site.
- Force traffic to https://
To force the normal traffic to your SSL secured website version, we need to add a little code in the .htaccess file. For that follow along.
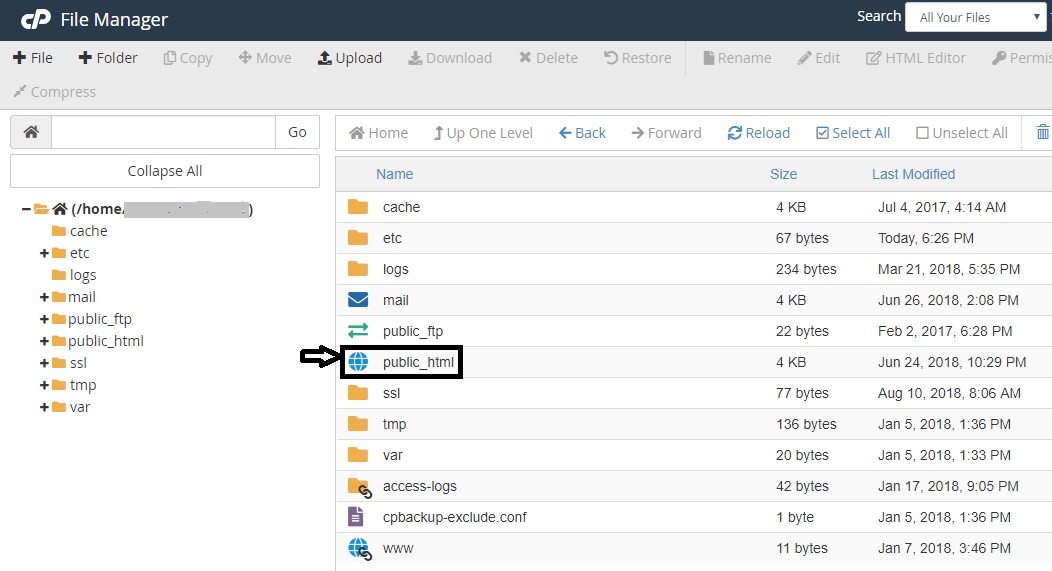
- Open the file manager in cPanel: In cPanel click on the ‘File Manager’ to open it.

- Open the public_html folder: In file manager, double-click on the public_html to open it.
- Show hidden files: By default, the .htaccess is hidden. Click on settings in the top right corner. Then check the show hidden files option, and save it.

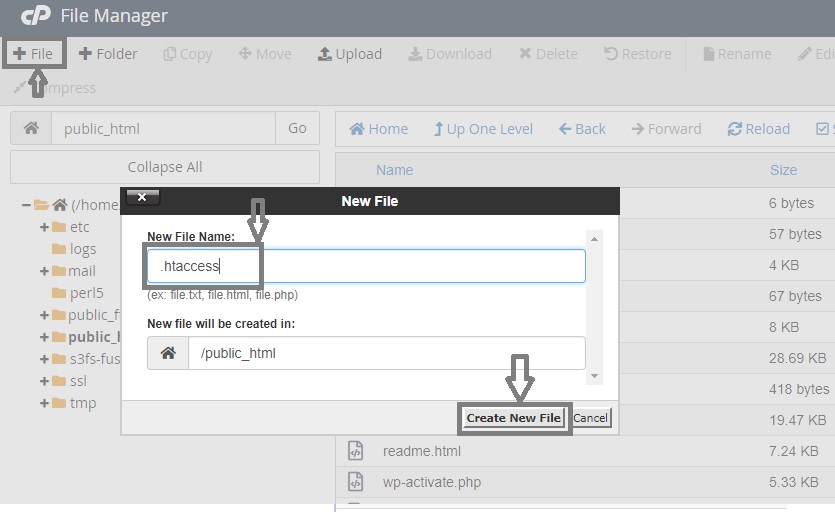
- Create .htaccess file if needed: If the .htaccess file doesn’t show up even after the previous step, click on the +File button at the top left. A pop-up will appear. In the new file name field, input file name as “.htaccess” and click on the Create New File Button. Then follow the previous step.
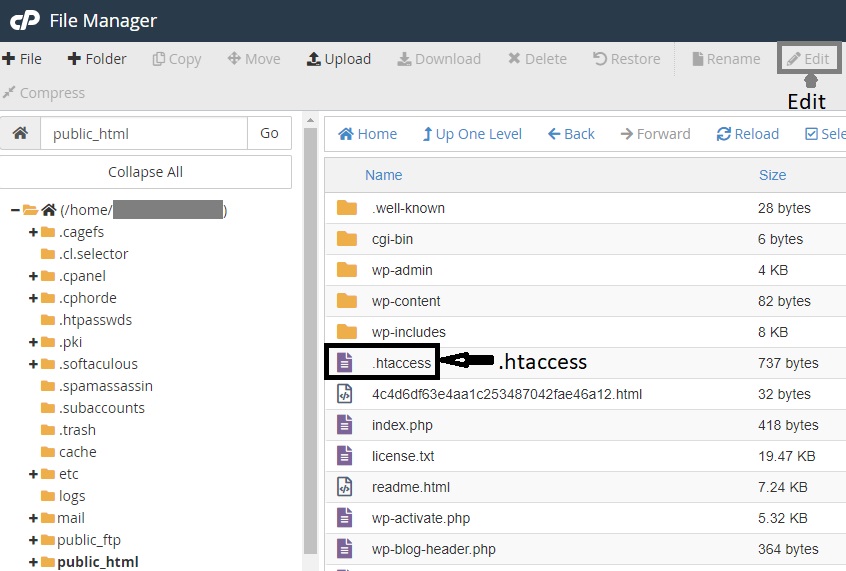
- Edit HTACCESS file: Now the .htaccess file will start showing. Select the .htaccess file, and click on the edit button in the top right corner.
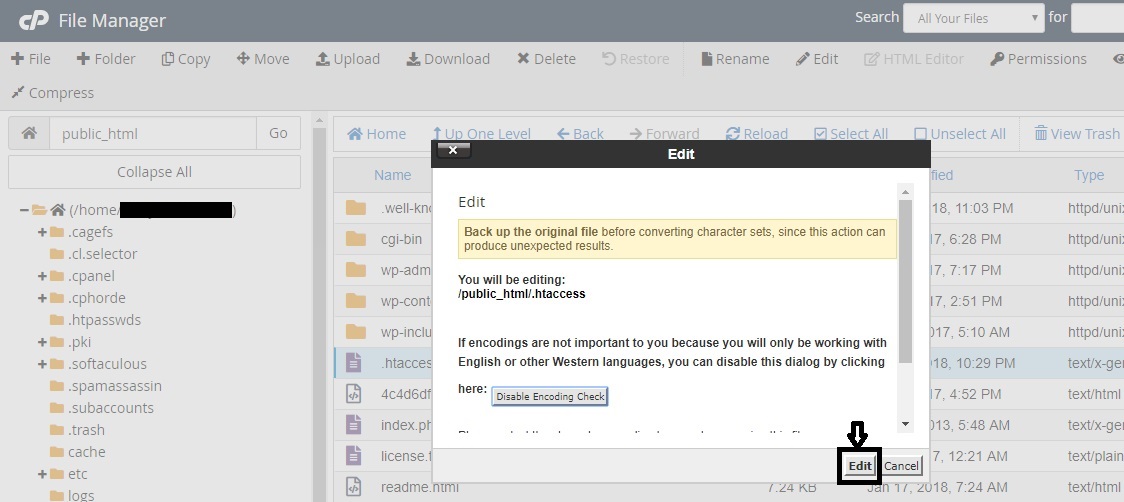
- A pop-up box will appear. Click on Edit.
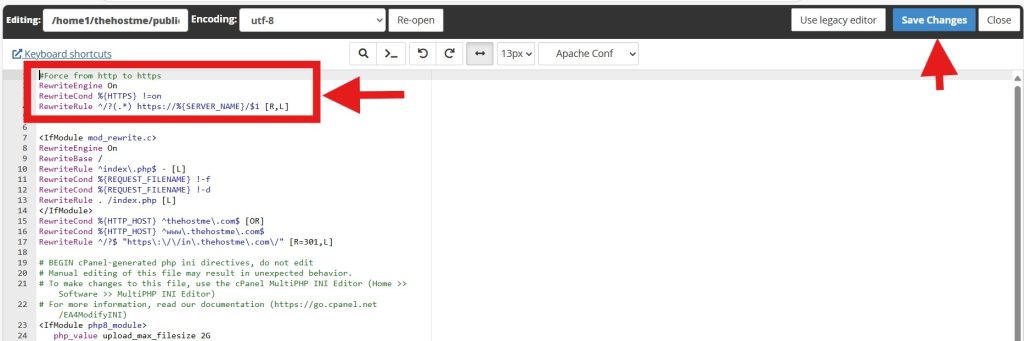
- Add the code now and save the .htaccess file: Now enter the following code at the top of the .htaccess file. Be very conscious while editing the .htaccess file. Don’t change anything else. Otherwise, your website may crash. Enter the following code:———————————————————————————–#Force from http to https
RewriteEngine On
RewriteCond %{HTTPS} !=on
RewriteRule ^/?(.*) https://%{SERVER_NAME}/$1 [R,L] - ———————————————————————————–
After adding the code, click in the “Save Changes” button at the top right corner to save the file.
The SSL should be working now. By following these steps, you can easily secure your website with SSL using cPanel’s “SSL/TLS Status” feature. A secure website not only protects your visitors but also improves your site’s SEO ranking and credibility. Happy securing! 🚀